Pages

Friday, March 29, 2019

Feet

The feet can measure the height.


THE FEET CAN MEASURE THE HEIGHT


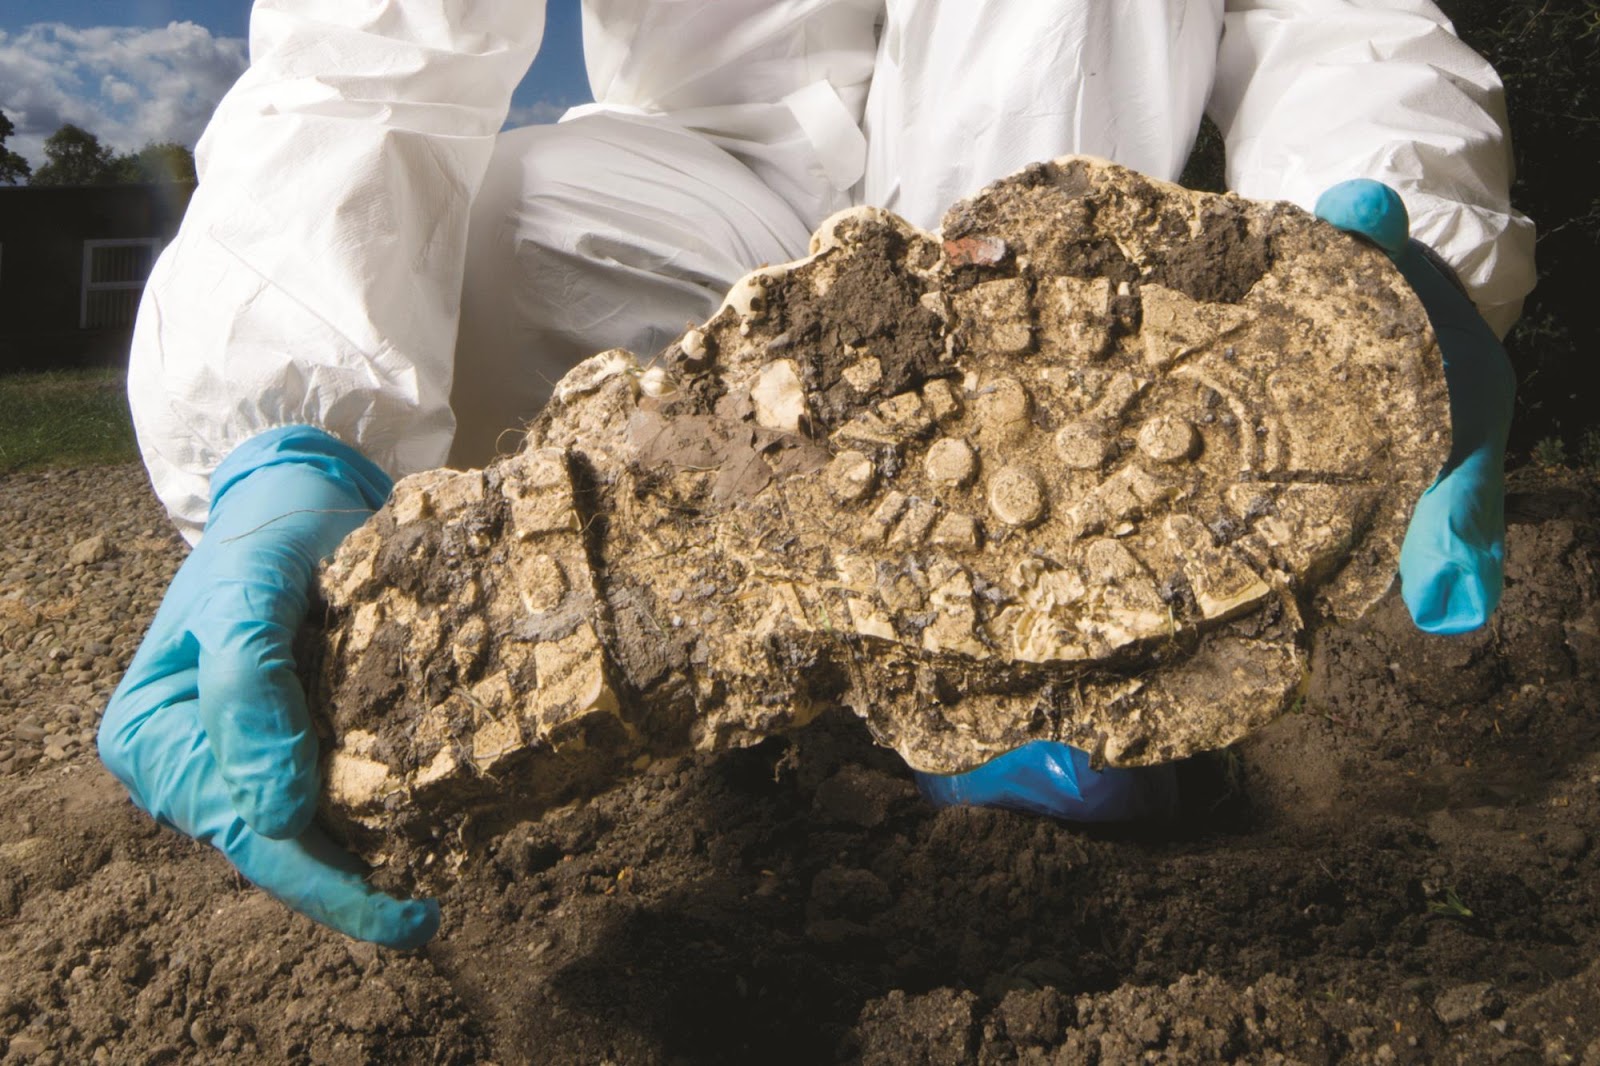
The bones of the feet can tell a lot about a person. What do feet reveal about a person's height? Forensic anthropologists team up with law enforcers to help solve crimes.
Bones of the feet can reveal an interesting fact about an individual. Let's combine math with forensics to see how.
Image result for foot chart sizeImage result for foot to height ratio chart

Aim:  To use forensic science techniques to measure the height of a criminal.

Materials:
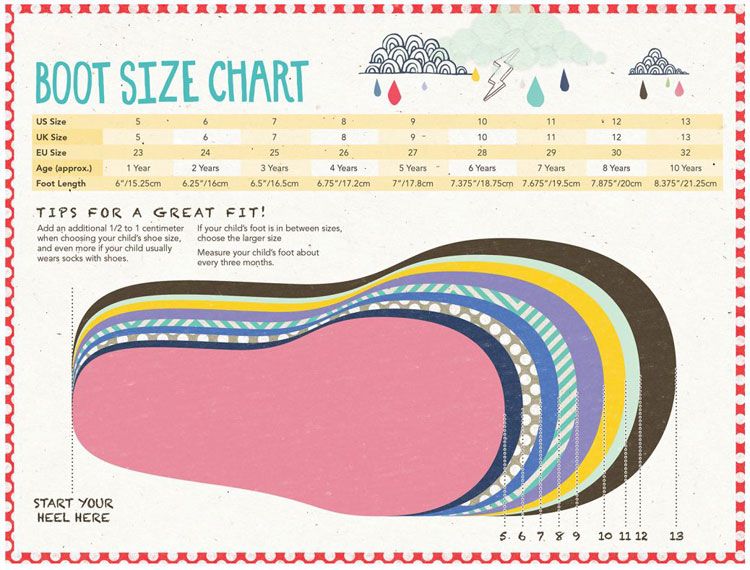
  1. Rulers (for height and foot size in cm and metres)
  2. A marker
  3. Chromebook
  4. Whiteboard/something to measure on

Steps:

  1. Measure your height in centimetres with ruler
  2. After you measure feet in centimetres with a ruler as well
  3. Write down what you got in the chart
  4. Divide you foot size with your height then times it by 100 in one equation
  5. Write the answer downhe answer down

Findings:
Name
Foot  (cm)
Height (cm)
Skyler
20
147.5
Shiela
22
158.5
Lhysette
19
143 cm
Rieya
23
147 cm


Divide the length of each person's foot by his/her height. then multiply it by 100.
Skyler = 13.5
Shiela = 13.8
Lhysette = 13.2

Rieya = 15.6

Home Chemistry -Forgeries


Hello everyone!
Today for science we were doing forgery so so far this has been amazing thanks to Mr. Palmer and Whaea Joe. Lately, we have been doing science based on detective kind of things like forgery and forensics they are actually really fun and you can even do it at home. This week is probably the last week to earn a science badge and I am trying my hardest to achieve that. So I hope you learn a lot of information from this blog post about forgery.

Image result for forgery

Graphologists are forensic experts who look at handwriting.

Image result for forgery

Many things can be forged: art works, money, writing, etc

Forgery link

Aim: To Analyse a signature using forensic science.

Image result for forgery


Material:


A pen / pencil
Tracing Paper
Writing paper
A ruler


Steps:

A. Top Of Letter Analysis

1. Sign your name on a sheet of writing paper and get someone else to try to copy it.
2. Place the tracing paper over both signatures and make a dot at the top point of each letter – for both signatures.
3. Join up the dots for both signatures to get two zigzag lines across the signatures. Are the lines the same?

B. Bottom of Letter Analysis

1. Put some fresh tracing paper over both signatures.
2. Put a dot at the bottom of each letter.
3. Join up the dots to make zig zag lines. Are the lines the same?

C. Slant Analysis

1. Put a fresh piece of tracing paper over both signatures.
2. Mark a vertical line down through the middle of each letter (using a ruler), slanting it in the same direction as
the letter.
3. Compare the set of lines for both signatures. 
What do they tell you.

Findings:


You
Friend
Top Letter Analysis
Are the lines the same?
Yes, I can actually tell that it's my name when I compare it.
When I did my friends signature I couldn't really understand it then after when I compared them I could not tell. They must've just not done the dots properly.
Bottom Letter Analysis
Are the lines the same?
Kind of but not entirely but when I compared them it was understandable.
Yes, I could it was good placing so then I could understand it.
Slant Analysis
What are the slants telling you?
It is telling me that there are 5 lines meaning there are 5 letters and also it is kind of following the zigzags.
There are 6 lines probably because I saw more different letters and my friend did not do my signature the same.


Conclusion:
I loved today's science it was about forgery! It is where we have to try to tell the person's personality is. This was really fun since I have never done this before and since I am able to do it at home I can totally do itwith my siblings. All we had to do was trace and draw and things like that if you want to try it for yourself look at my instruction I am sure it will help:)


Activity : Get someone to try to forge your signature and then try both of these methods to analyse it.

Write up the findings based on the following questions.


  Writing analysis of a friends forgery.


The size of the letters – all big, all small, mixed?

Where they dot the ’ i ‘– over the top or off to the left or off to the right, or not at
all


How they cross their t – straight, angled up or down, where on the t stroke it
is crossed


The slant of the letters (use a ruler) – forward, backward, upright, mixed


Are there breaks in words, or are all the letters in the words joined up


The length of stalks on y, q, p, below the lines – long or short


Tuesday, March 26, 2019

Forensics

Forensics

1. What is the definition of forensic science?
Forensic is an application of scientific methods to investigate a crime

2. Name 5 different kinds of activities used in forensic sciences and find a picture for each.
Investigating -Image result for forensics investigator
DNA -Image result for forensics DNA
Fingerprints -Image result for forensics fingerprints
Footprints -Image result for forensics footprint
White powder -Image result for forensics Ballistics


3. Name 5 jobs that would use forensics to investigate crime
  1. Crime scene investigator
  2. Forensic engineer
  3. Chemist
  4. Documents examiner
  5. Science technician photographer

Fingerprints

Aim: To look at the different types of fingerprints.

Material:

  1.  Balloon
  2.  Inkpad
  3.  Finger
  4.  Magnifying glass
  5.  Wipes
  6.  
  7.  

Steps

  1. Get ink pad  
  2. Get Balloon (any colour except dark colours)
  3. Wipe finger with wet wipe till clean
  4. Press thumb on ink pad for only 2 seconds  
  5. Quickly take your finger off the ink pad and place on the balloon while deflated
  6. Press your thumb on the balloon hard for 3 - 5 seconds (do not move your finger)
  7. Take your thumb off then inflate the balloon slightly not too small, not too big ( when dry )
  8. Look at you thumbprint with a magnifying glass to see what pattern you have


Image result for fingerprint types

Record the types of fingerprints from those in your group.

Name
Fingerprint 1 ( Thumb)
Fingerprint 2 (finger)
Skyler
Loop
Index finger - Loop
Lhysette
Loop
Index finger - Loop
Rieya
Loop
Ring finger - Whorl


Summary of findings:
Today our first experiment was easy and short all we had to do was find out what print pattern we have on our finger. We used ink and placed it on a balloon and blew it up to see what they would look like. I was really fun to do some investigation things and trying to do it ourselves when I see it on tv.


Hidden fingerprints:

Aim: To learn how to lift hidden fingerprints from an object.

1. Lifting and Gathering fingerprints.

Equipment:
  1.  Brush
  2.  Plastic file
  3.  Finger
  4.  Tape
  5.  Magnifying Glass
  6.  Powder
Method;
  1. First use a brush to put a thin layer of white powder on your finger
  2. Place your finger on a card or a desk any platform you have.
  3. Hold there only for 2 seconds at the max
  4. Then get some tape then place it on top of where the fingerprint is
  5. Take the tape off and analyze it with a magnifying glass
  6. Take a photo if you want it to last longer